This page covers everything you need to know about setting up an incubator for breeding chickens
Cleaning and sterilisation
If you’ve bought a new incubator from Omlet then you don’t need to sterilise it. However, if you’ve bought a second hand incubator or you have used your incubator before then it is highly recommended to sterilise it. You should ensure that the incubator is unplugged and take care not to get any liquid into the electronics, as this might damage it. Some incubators have electronics that you can’t see - so you shouldn’t immerse any incubator parts under water. To sterilise your incubator - you can use Brinsea’s own brand sterilising liquid. After washing the incubator, you should dry the inside using a clean cloth.

You should sterilise your incubator each time before you use it.
Where to put your incubator?
An ideal place to site your incubator is a location which has a steady, constant temperature varying by only a few degrees. If the room has large variations in temperature then the incubator will find it harder to maintain a constant temperature inside. Ideally the room should have thermostatic controls and 24 hour heating so that there isn’t a large drop in temperature at night. You should generally try to keep the incubator away from radiators, windows or doors - so that draughts and sunlight do not affect it too much. You should also try and find a location which is easy to access because you will want to be able to regularly check on your eggs.

An incubator setup up at home.
Marking your eggs
It’s a good idea to accurately mark your eggs. Firstly, you can easily tell which chicken or breed has laid the egg. Secondly, it helps identify whether an egg has been turned - otherwise an egg always looks the same. You should place an X on one side and and O on the other side. This ensures that you can see which eggs you have turned.

You can mark each egg with a pencil or permanent marker pen
Testing your incubator
You should run your incubator for several hours so that it is pre-warmed before loading it with eggs. After it has been running for a while you should check that it has come up to the correct temperature. Even if your incubator is new the temperature might not have been set correctly in the factory and it is well worth double checking it. If the temperature isn’t correct, you will need to make adjustments.
Loading your incubator
Your incubator should have been running for several hours. You should then bring your eggs from their storage room (at 12 degrees C) and let them slowly come up to temperature. Do not load you incubator with different species because they will have different incubation temperatures and durations. For example a bantam might hatch a day earlier than a larger chicken breed.
Loading a Brinsea Mini Incubator
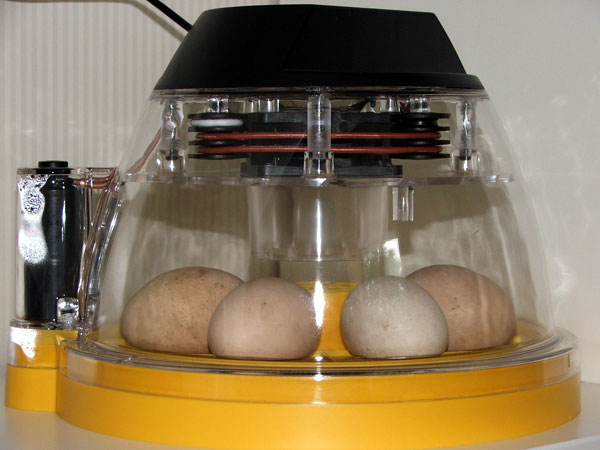
You can fit up to 10 eggs in a Brinsea Mini Eco incubator. You should place the eggs on their side at least 2cm in from the edge of the incubator base so that they are clear of the “skirt” of the lid when it is fitted. If you eggs are of varying size, you will have to experiment to maximise the capacity of the incubator.

How to load a Brinsea Mini Eco Incubator.
Loading a Brinsea Octagon 20 or 40
To load a Brinsea Octagon 20 or 40 you should place the eggs in rows between the wire loop dividers. The dividers prevent the eggs from rolling and must be positioned so that the eggs rest on the tray bottom and are not put under pressure from the bar. You can place the eggs on their end with the large end of the egg upward. This is because the chick’s head will form in the rounded end of the egg. Don’t panic if you can’t get the eggs perfectly upright.

Note: the eggs are places round end upwards.
Switching on the Autoturn
If you have a Brinsea Mini II Advance, Brinsea Maxi 24 or Brinsea Ovation 28 EX - you should now switch on the auto turn. The autoturn system will turn the incubator and eggs on an hourly cycle. You might notice that occasionally the turning device will jump a little - this is normally because of the gearing mechanism.

Comments
Karen, 4 May 2021
I have a small incubator with 7 eggs but have reed that sometimes the chicks don't have enough room to hatch so I have brought a bigger on. In the small one the eggs are up right with the pointed end down, but my new machine shows them on there side, am I ok to move them to the new incubator and put them on there side?? I'm on my 12th day.